
Task Set 1: Getting Started
The first thing to do when shifting your course from one delivery format to another is to ensure your students know what is going on and what to expect. Task Set #1 focuses on that goal.
Things to Do:
- Using your regular WSU credentials (WSUID and password), login to Blackboard, the
University's learning management system. Make sure to login directly by typing blackboard.wichita.edu into the address bar on your computer's browser. Do not login through the MyWSU portal
area as this will cause time-outs for you and your students.

- Once you login, find the link to "My Courses" and click it. If you see two links to
"My Courses" that's fine. You may choose either link.

- Locate your courses for the current term. Each course you teach has a Blackboard area. You do not have to request Blackboard areas to be created for you.
- Click on the title of the first course you would like to work with. This will take you into the Blackboard area for this specific course. You will enter your course on the "Announcements" page.
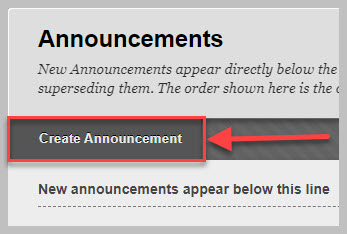
- It is now time to post your first announcement in your course. To post an announcement,
click the "Create Announcement" button found close to the middle of the page. If you
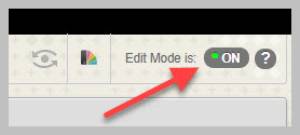
do not see the "Create Announcement" button, look to the top right and make sure you
see "Edit Mode is: ON." If the edit mode is "OFF," turn it on by clicking the word
"OFF." Then you should see the Create Announcement button.
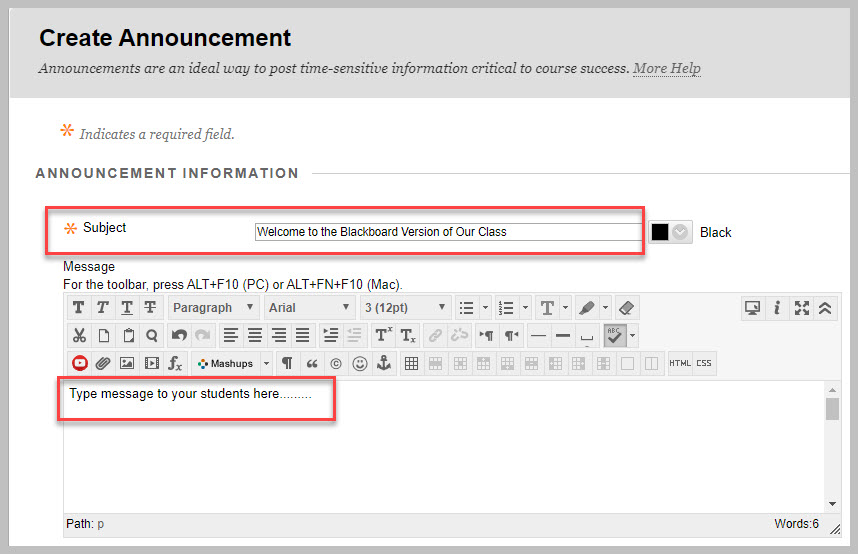
- Once you have clicked "Create Announcement," put the subject of your announcement
in the "Subject" field. We recommend something straight forward and friendly like,
"Welcome to the Blackboard Version of Our Class." Type a short message to your students
in the "Message" editor. To address your students' concerns, you might consider using
this announcement to set expectations about how often you will answer your email,
how you plan to hold class meetings (if you know yet), and how you will send out additional
updates in the future. Make sure to sign your announcement.
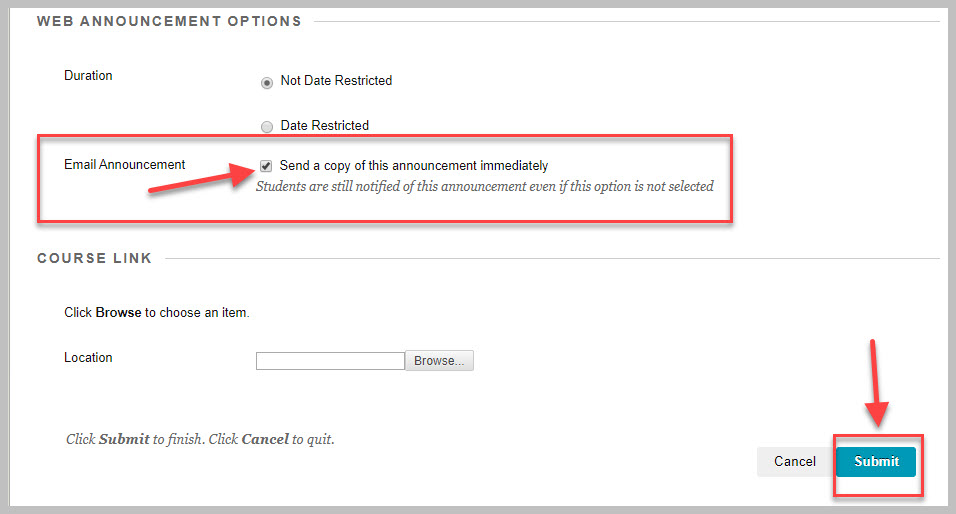
- Once you have created your first announcement, click "Send a Copy of this Announcement
Immediately" to send this announcement to your students' Shockers.Wichita.edu email
account. Leave the other settings as you found them. And then click "Submit" at the
bottom/right of the screen. CONGRATULATIONS! You have posted your first Blackboard
announcement in this course, and your students will see the announcement in the course
and in their email.
- Repeat steps 4-7 for each of your courses.
- Once you have posted an announcement in each of your courses, return to the first course you worked with to post the syllabus. Before you can post your syllabus, you will need to locate the document on your computer. Blackboard will allow you to upload many file types. The best choices are .doc, .docx, .htm, or .PDF. With .docx being the best choice for this task.
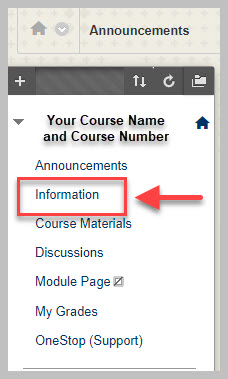
- Once you have returned to your first course, find the "Information" area by clicking
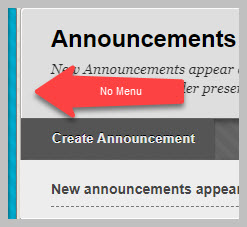
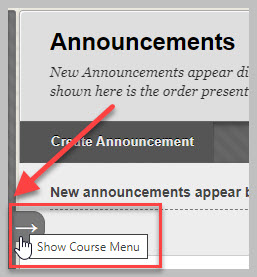
on the link in the left-hand menu. (NOTE: depending upon the size of your screen,
you may not see the menu to the left. It is there, and you can find it by mousing
over the the edge of the screen just below the "Create Announcement" button. When
you see a small arrow pop up, click on that, and your side menu should appear.) This
area is where you will put your syllabus and any other course documents that do not
present course content. Suitable documents include the syllabus, a course schedule,
course policies, etc. We ask all instructors to organize their course in this way
to help minimize confusion for students. This way, they will always know where to
find a class syllabus and related documents.
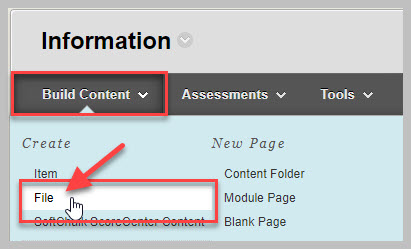
- In "Information" mouse over "Build Content" and click on the link that says "File."
It should be the second link from the top under the heading "Create." If you do not
see "Build Content" you need to check that your edit mode is turned on. For a reminder
on how to do that, please refer to step 5 above.
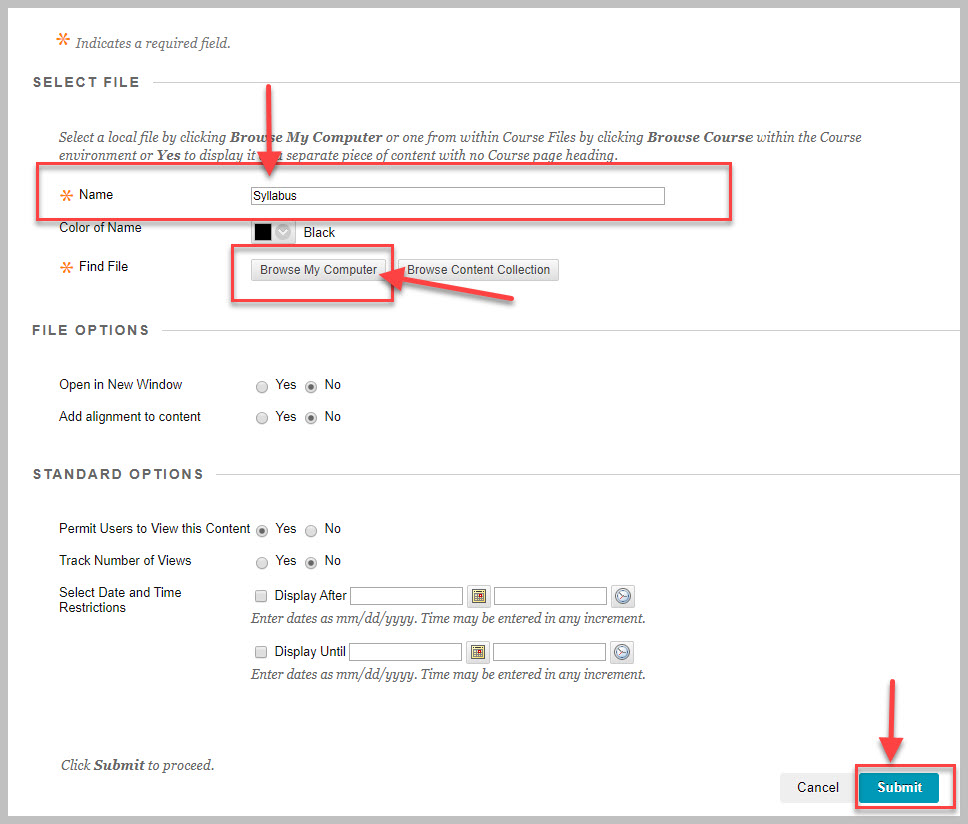
- Give the link for your syllabus a name. We suggest naming it "Syllabus" or "Updated
Syllabus." Then find your syllabus file on your own computer by clicking "Browse my
Computer" and navigating to where you saved the syllabus file. Choose the syllabus
file. Leave all Blackboard settings in the default positions. Click "Submit." CONGRATULATIONS!
You have posted your syllabus. NOTE: You will see a little "dial" next to your uploaded
file either immediately or soon. This is an Ally accessibility indicator. At this
time, you can ignore this indicator.
- While in the "Information" area, you can repeat these steps to post any other course information documents such as an updated schedule or course policies.
- Move on to your other courses and repeat steps 9-13 for your other courses.
- Finally: If you have any students who are actively receiving accommodations from the Office of Student Accommodations and Testing, consider reaching out to ODS at disability.services@wichita.edu when you know your course plans so they can consider the impact of accommodations for your student(s). Please do not contact individual staff members in ODS even if you have an existing relationship with someone. ODS needs all contact to come through the general email address.