Creating and Authorizing a Proxy
Creating a Proxy
All parents, or other third-party proxies, must have a valid email address to be granted access. The same email address cannot be used more than once; i.e. each parent cannot establish a separate login with the same email address.
To start the Proxy process, login to myWSU with your myWSU id and password.
Go to the Student Profile card and select Student Profile:
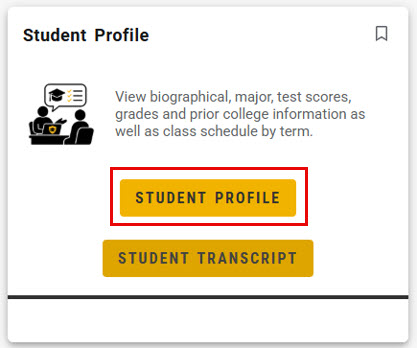
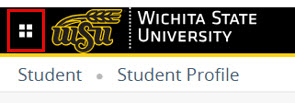
You will then see your profile picture. In the upper left-hand corner of the card, click on the four-square menu:
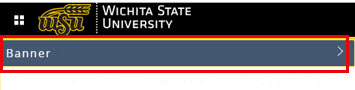
Click Banner:
Then click Student Menu:
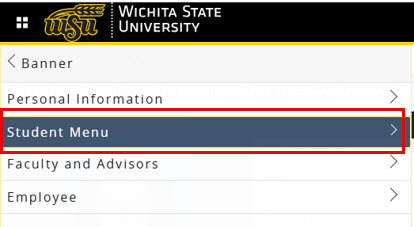
Once the Student Menu is expanded, click on Manage Proxy Access:
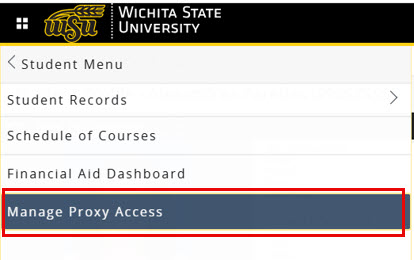
In the upper right-hand corner, click on Add New :

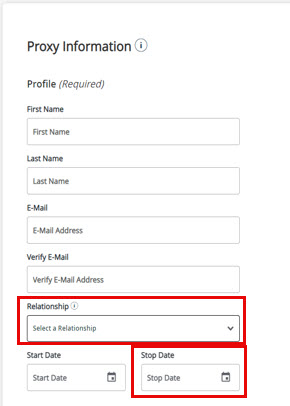
Create your proxy by completing all required fields then clicking the Submit button to save:
Enter the proxy profile information and select the relationship from the drop-down menu. Once a relationship has been selected, the authorizations will automatically expand below for you to select. The access period or “stop date” defaults to 6 years, but you may change the stop date as desired. Proxy access will be ended whenever a student’s record is inactivated, regardless of the default timeframe.
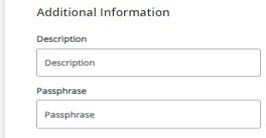
Enter in additional information including a description for the proxy (e.g., Mom, Dad, etc.) and a passphrase. The passphrase can be any word or phrase that you easily remember that you should share with your proxy for their use in communication with WSU. The passphrase allows the proxy to be given ONLY information allowed by their student. This is NOT a security question but more like a password that is given verbally.
Authorizing a Proxy
Authorize your proxy to view records by checking each box corresponding to the information you would like to authorize your proxy to view. For more information about what each authorization allows the proxy to view, visit www.wichita.edu/proxy. Note that you can also give WSU permission to speak with your proxy about the items you authorize. The proxy must know the passphrase in order for WSU to authenticate them. If you are setting up multiple proxies, you can also use the "Copy Authorizations" drop-down menu to copy the same authorizations from one proxy to another. Click Submit to save.
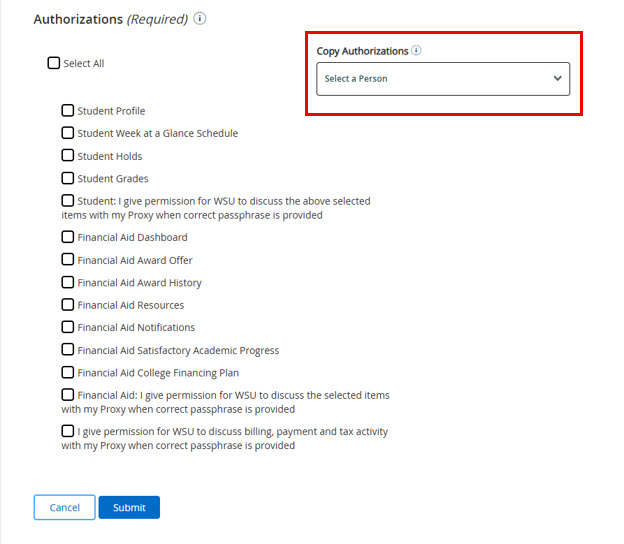
When a Proxy is added, both the student and the proxy will receive confirmation emails. The proxy will be provided with a time sensitive link to set up a password for accessing the student’s record.
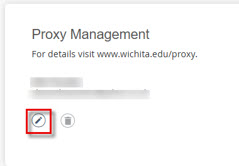
After clicking submit and saving the proxy, you will be redirected back to the Proxy Management home screen. Click on the pencil icon under the proxy's name to go back to emails regarding the passphrase and authorizations:
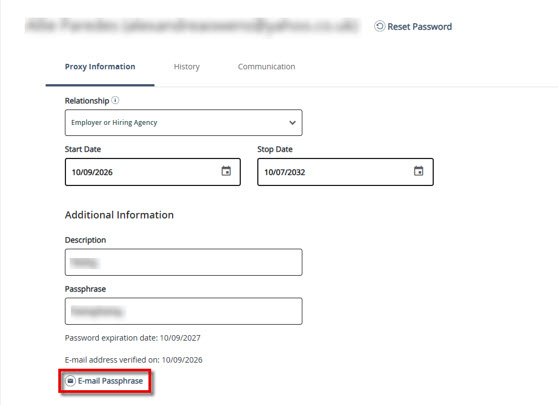
If you set up a passphrase, select E-mail Passphrase so the proxy receives an email with the passphrase:
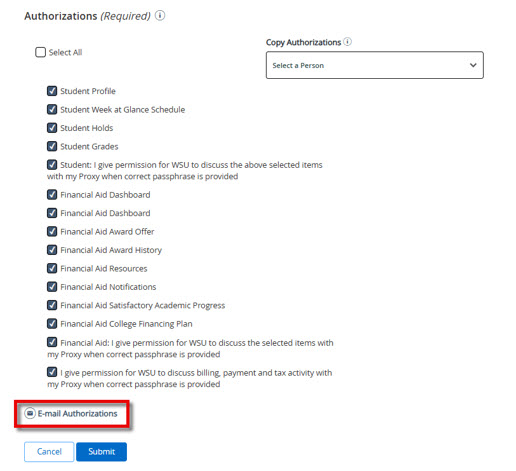
Select Email Authorizations to send an email to the proxy with a list of the authorizations that can view or discuss:
Removing Proxy Access
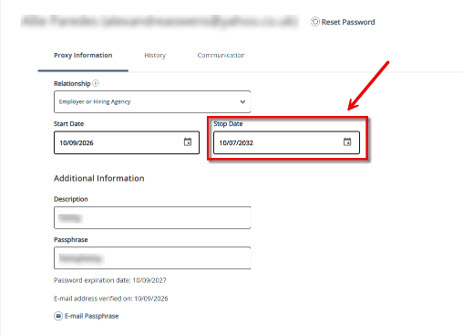
If you no longer want a proxy to have access, change the Stop Date to today’s date and uncheck all but one authorization by performating the below steps.
Click on the pencil icon to edit the proxy's infomation:
Change the Stop Date to today’s date:
Uncheck all but one authorization and click Submit. The system requires at least one authorization be checked on a proxy but the stop date will change the status from active to inactive. Removing authorizations is just another way to indicate that you no longer want the proxy to have access.
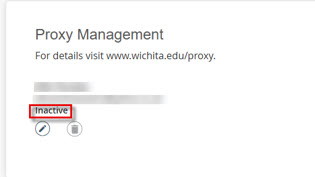
Now you will see Inactive under the proxy information which indicates they will no longer be able to view or discuss any authorizations. The proxy will not receive any emails regarding this change but will see an error message when they log in saying access is expired.