Scheduling Your Zoom Meeting
Open your zoom client and log in.
Select the “Schedule” icon. 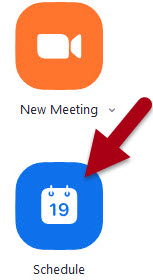
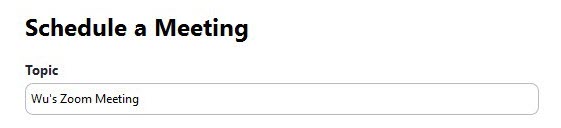
Provide a name to your meeting, preferably something that will help your participants recognize they are in the right place.
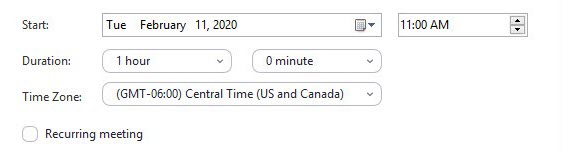
Provide a start date and time. It is important to note that Pro Accounts are required for sessions longer than 40 minutes with 3+ users. More information about Pro Accounts can be found in the Pro Account training page.
Once you have provided a start date and time, select which Meeting ID you want to use. If you choose not to user your Personal Meeting ID, you will be using the “generate automatically” option which provides a random ID number/location.

You can also choose to use a password if you would like, though this is entirely optional.

Under the Video options, select Host: On and Participants: On to allow the use of video by the host and the participants. If you decide to turn off your camera once inside the meeting, you can easily do so for yourself and your participants.

Next, under the Audio options, select either Telephone, Computer Audio, or Telephone and Computer Audio. This indicates how participants—including yourself—are allowed to join the meeting with audio.

Finally, select the calendar option you want to use. This produces a meeting invite in this specific calendar type and will open a copy of the calendar invite once you select the “Schedule” option.

Click Schedule and your meeting will be all set.