Creating Your Video
These instructions will guide you in the process of creating a Panopto video. Please select your operating system.
This training will walk through the process on a Windows system.
Launch the Recorder and Sign-in. It is important to note that failure to properly sign-in and connect to internet will force you to create videos offline and then upload only when you have fully signed-in and have internet connection.
Before you start creating your video, you will need to check your recording settings.
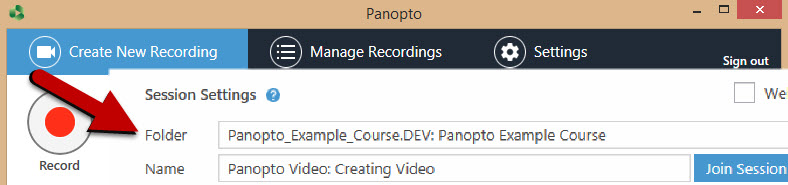
1- Change Recording Folder and Name
Select the proper folder from the folder dropdown.
In the name box, directly under the “folder” dropdown, provide a unique and descriptive name for your video. It is not recommended that you leave the pre-filled name of the date and time, since it can make it quite difficult to search for and locate your video in the future.
*If you prefer to record offline and upload at a later date, you can select that option from the Folder dropdown menu as well.
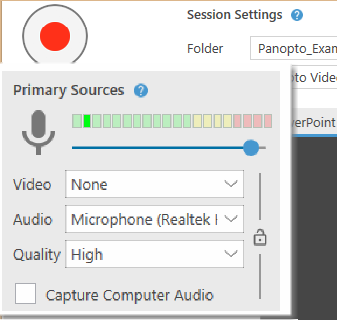
2- Select Your Primary Sources
In the Primary Sources channel box, select your primary video, audio, quality, and if you want your computer audio captured.
Be sure to check that your microphone is registering sound. The colored scale should be fluctuating as you speak, which indicates that the recorder is registering your audio.
The "Video" in this section refers your computers cameras that can capture your visage. If you do not want to be on camera, you can select the "None" option. This will not impact your Powerpoint or desktop recording, as those are addressed in the "Secondary Sources" section.
3- Select Your Secondary Sources
In the Secondary Sources channel box, select or deselect as needed for additional video sources.
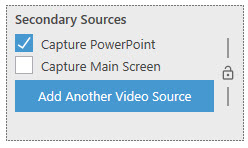 For instance: You are recording a lecture in which you are using PowerPoint slides.
You want your students to be able to see both you and the slides in the video. In
this case, your primary source for video will be a camera you select and the secondary
source will be “capture PowerPoint.”
For instance: You are recording a lecture in which you are using PowerPoint slides.
You want your students to be able to see both you and the slides in the video. In
this case, your primary source for video will be a camera you select and the secondary
source will be “capture PowerPoint.”
4- Use the Preview Window
In the Preview Window next to the Primary and Secondary Sources, you can select the PowerPoint file you want to use for your video, if needed.
Additionally, please note that for each secondary source selected, a "tab" will be listed at the top of the Preview Window that you can flip between to preview each source. Although the PowerPoint will not open in the preview screen, the file will be listed.
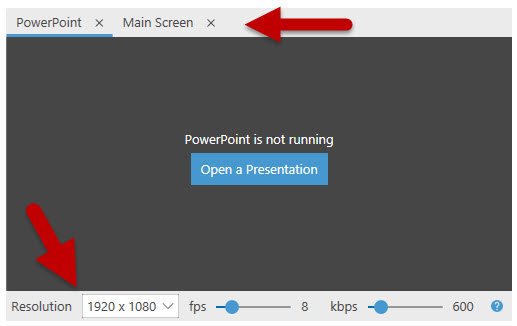
Lastly in this area, you can choose the resolution that your video will be recorded in, as well as adjusted the frame rate. Though the video quality can be adjusted some after uploading, it is important to check this section if you are capturing content that may be fast-moving or include very small detail.
5- Start Your Recording
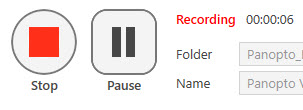
When you have finished selecting and adjusting your settings and sources, you are ready to start your recording by clicking Record.
Once you click the Record button, your options will change. You can Stop the recording which will trigger a completion window, or you can pause the recording if you need to step away or briefly pause your recording, but do not want to fully stop.
If you do not want to exit your PowerPoint or change the focus of the recording to bring up the recorder, you can use hotkeys to pause and stop. F8 will start your recording, F9 will pause your recording, and F10 will stop your recording.
 Note that when you select the Pause button, your video streams will continue to record,
but will be automatically "cut" from the video when uploaded.
Note that when you select the Pause button, your video streams will continue to record,
but will be automatically "cut" from the video when uploaded.

When you are completely finished with your recording, you can select the "Stop" button, which will automatically open the Completion window.
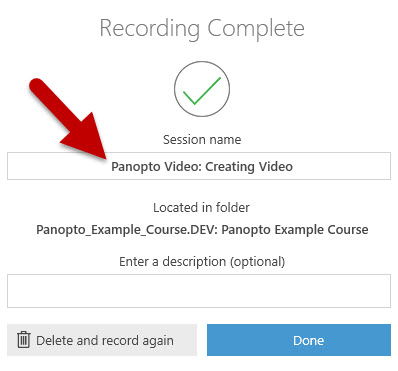
In this window you can choose to delete the recording and record again or select "Done" which will start processing and uploading the video to your selected folder. One last note, if you have forgotten to provide a proper name for your recording, you can edit the Session name from this completion window before the video is uploaded.
This training will walk through the process on a Mac system.
Launch the Recorder and Sign-in. It is important to note that failure to properly sign-in and connect to internet will force you to create videos offline and then upload only when you have fully signed-in and have internet connection.
Before you start creating your video, you will need to check your recording settings. *Please note that the red circles with numbers do not show up in the recorder.*
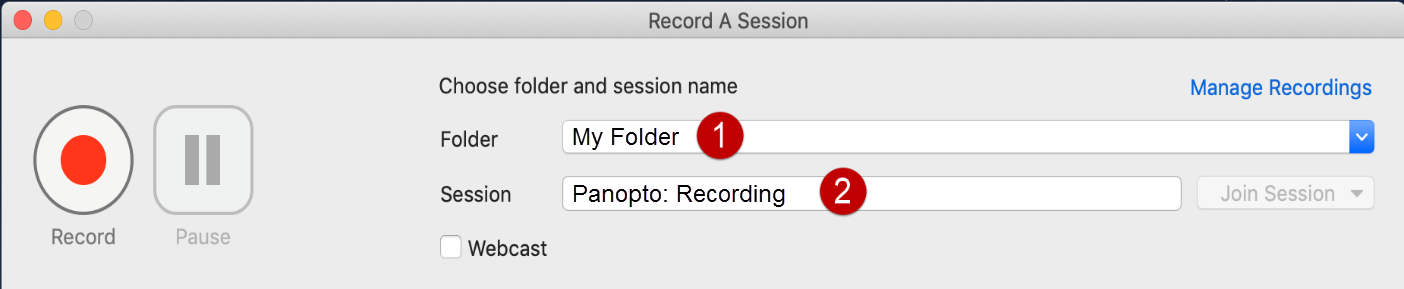
1- Change Recording Folder and Name
Select the proper folder from the folder dropdown.
In the name box, directly under the “folder” dropdown, provide a unique and descriptive name for your video. It is not recommended that you leave the pre-filled name of the date and time, since it can make it quite difficult to search for and locate your video in the future.
 *If you prefer to record offline and upload at a later date, you can select that option
from the Folder dropdown menu as well.
*If you prefer to record offline and upload at a later date, you can select that option
from the Folder dropdown menu as well.
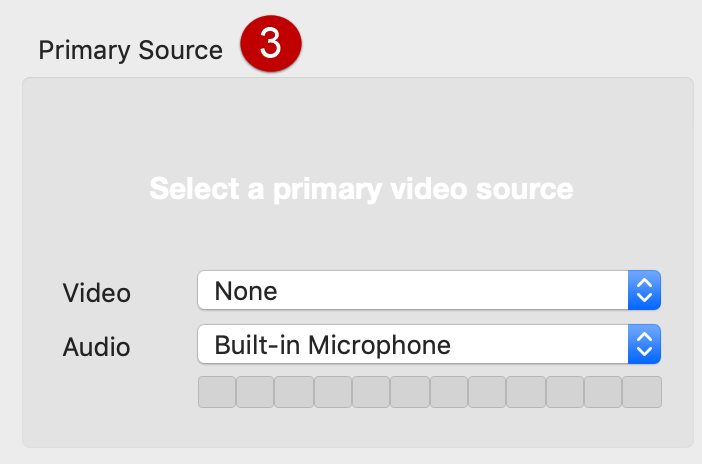
2- Select Your Primary Sources
In the Primary Sources channel box, select your primary video, audio, quality, and if you want your computer audio captured.
The "Video" in this section refers to your computer's internal cameras that can capture your visage. If you do not want to be on camera, you can select the "None" option. This will not impact your Powerpoint or desktop recording, as those are addressed in the "Secondary Sources" section.
Be sure to check that your microphone is registering sound. The scale below the audio dropdown box should be fluctuating as you speak, which indicates that the recorder is registering your audio.
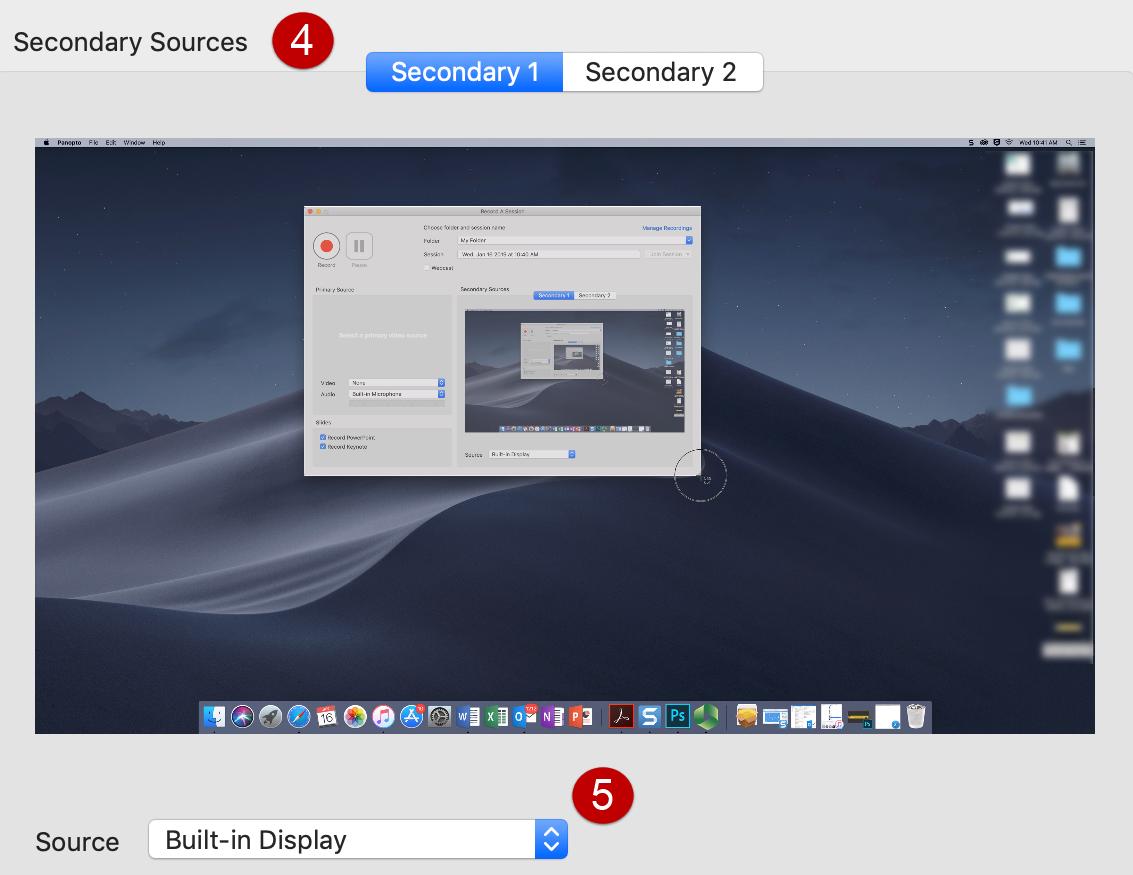
3- Select Your Secondary Sources
In the Secondary Sources window, select or deselect as needed for additional video sources. Built-in Display refers to capturing your desktop. If you do not want to record your desktop, change the source dropdown to “None.” If you have additional external sources, you can click on the "Secondary 2" tab and change the dropdown to select it.
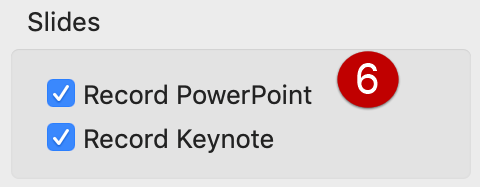
4- Select Your Slides
In the Slides section, select and/or deselect the option(s) you want to use for capturing slides.
5- Start Your Recording
When you have finished selecting and adjusting your settings and sources, you are ready to start your recording by clicking Record.
Once you click the Record button, the record options will change. You can stop the recording or you can briefly pause your recording.
In some instances, it may be easier to use hotkeys or keyboard shortcuts to start, pause, or stop your recording. "Option + Command + R" will start your recording, "Option + Command + P" will pause your recording, and "Option + Command + S" will stop your recording.
Note that when you select the Pause button, your video streams will continue to record,
but will be automatically "cut" from the video when uploaded.
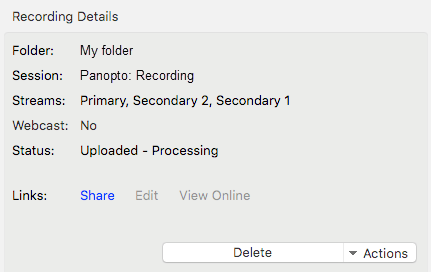
When you are completely finished with your recording, you can select the "Stop" button and will be directed to the Manage Recordings page. If you have preferences set to automatically upload, the video will begin to process and upload to the selected folder. If you are recording offline or have not set your preferences to upload automatically, you can upload to server using the options in the Recording Details area.